
By Chase Ford
Corduroy is a pile weave that is created by weaving floats along with a ground weave. The floats are cut after weaving to form the pile. Corduroy can be either single or double. Generally, double corduroy is used by handweavers because it is the denser of the two weaves. Many variations are possible. Peter Collingwood's The Techniques of Rug Weaving explores corduroy in detail and is an excellent resource.
Sampling
I began with a sample. For inspiration, I looked at Loie Stenzel’s “Madras Double Corduroy Rug” featured on page 16 of Handwoven’s Design Collection 8 (Interweave Press) as well as Joe Ben Wheat’s book Blanket Weaving in the Southwest. We liked Loie Stenzel’s suggestion for using patterned as well as solid fabrics, so I spent some time familiarizing myself with the color palettes that appeared in the blankets in Wheat’s book. I found several colors and prints of a lightweight 100% cotton fabric to sample with.

Sampling can seem like a hassle but it really is worth all the extra work. I learned which colors worked well next to one another and which didn’t offer enough contrast, how long the floats should be in order to make the right length pile, how best to cut my weft strips to minimize fraying. These are the things I learned just having to do with the weaving!
Designing
After finishing the sampler for this project, I decided which colors I liked together and set out designing the final rug. During my sampling, I found that by alternating colors on the odd and even pattern picks and alternating again every few repeats of my treadling I could create a nice checkerboard pattern with the floats. I decided to use this pattern as the main section of the rug with contrasting borders on either end.
Once I had a rough idea of what I wanted the rug to look like, I sat down with some graph paper and started to play with proportions. I ended up using phi (pronounced fee), a mathematical number not unlike pi to determine the size of my borders and central section. Phi, also known as the “Golden Ratio”, is often used to determine proportions. It owes its popularity to the fact that many things in nature, such as the leaves of plants, grow proportionally according to phi. I developed a design of 12" long borders on either end with a central section of 36".

I decided to make the hem on either side of the rug 5" in order to have plenty to work with as the pile will determine how much of the hem is seen. I’d rather have a little extra waste than not enough woven.
Since the warp is all but invisible underneath the rags, the only place it shows is in the hem at the beginning and end of the rug. For this reason I chose a deep navy 8/4 poly-cotton rug warp that contrasted with the pile borders and matched the darker sections of the middle.
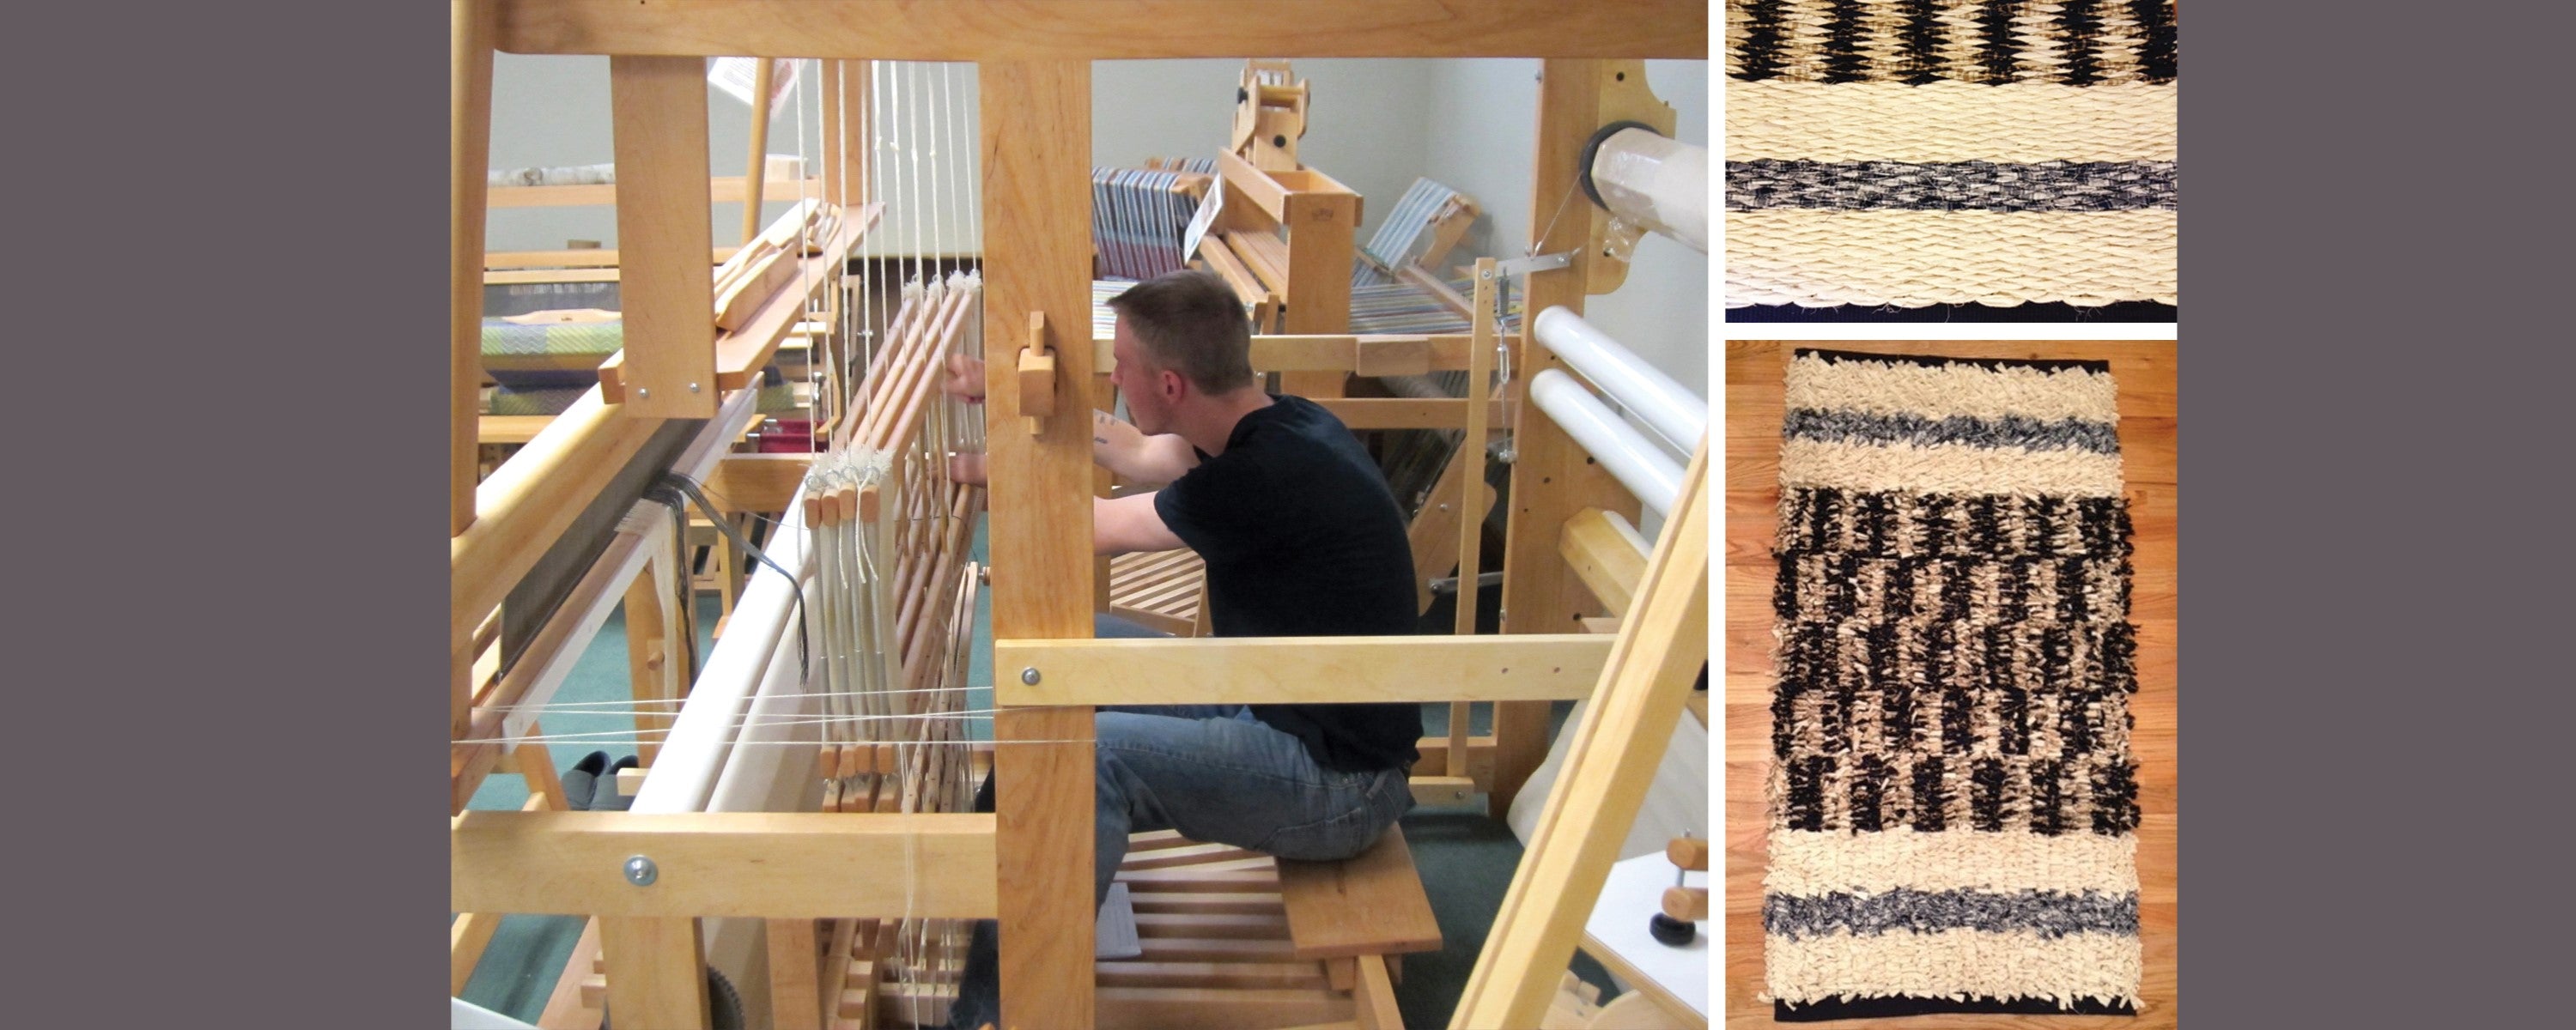
According to Peter Collingwood’s The Techniques of Rug Weaving, it is a good idea to always thread a whole number of repeats or a whole number plus a half in order to avoid unnecessary complications. At 4 ends per inch, with 20 ends per repeat, the total number of warp ends fit perfectly into 6 threading repeats to give my desired weaving width of 30". The block threading used in this rug has five warp ends on each shaft. In the photo above, you can see me warping the Cranbrook Loom.

An important thing to remember is that the length of the pile will be half the length of the float because the float will be cut. A way to lengthen the floats and make a deeper pile is to manually pull up on each float as you weave. This will require more weft and will be slower to weave than simply throwing the shuttle and beating.
Calculating Fabric Yardage
To determine how much yardage of each color I would need for weft, I calculated the area of my sampler and learned that 2 yards of fabric would roughly yield 252 sq. in. of tripled rag weft strips at 3/4" wide. I tripled the weft in order to allow colors to blend more subtly as well as for added thickness. I then calculated the area I wanted the final rug to be and got 1800 sq. in. I then took the dimensions of each section of color and calculated the area to know just how much of each color I needed. I added an extra yard or two to all of my numbers to be sure I’d have enough. I found I would need 6.5 yards of the white in the borders, 2 yards for the light blue stripes in the borders, and 6 yards each of both light and dark fabrics for the center patterned section of the rug. This made the total amount of fabric I needed around 20.5 yards.
Cutting Strips
I found the simplest way to cut my strips was to use a straight edge and a rotary cutter on a self-healing mat with a measured grid. Connecting the strips was made simple with a washable glue stick. The glue is invisible when dry, and once the weaving has been washed, the glue will disappear completely. Whenever I noticed two strips that had been glued together acting as a float I tried to center the glue seam in the middle of the float so that when the glue dissolved in the wash the consistency of the float length would not be affected.

Weaving
The weaving of this rug goes very quickly as each treadling repeat yields about 1". It is a simple, straight treadling. This was my first time using a temple and while I’m always mindful of my selvedges, it really helped keep them nice and straight under all the tension from the rags.

Due to the threading as well as switching between weft colors, the selvedge warp is not caught from time to time. To remedy this I simply paid attention to what was happening at the selvedges and placed my shuttle over or under the edge thread as necessary.
Finishing
After cutting the rug off the loom, the first order of business was to zigzag stitch at either end to protect the hem weft from raveling. Before finishing the hem, I cut the pile. The floats are not directly on top of one another but are staggered, so it is important to be careful to not accidentally cut into the sections above or below. My final step was to hem the rug, making the hem wide enough to just peek out from underneath the pile.

